Retro Industrial-Chic Kegorator Build
A few turns back I posted a picture of a kegorator build I did on social media. While it didn’t blow up, there was enough interest in how I did it that I felt it appropriate to document the build here. And monetize. Many of the links are affiliate and will benefit me. If you want me to do the work for you, I’m happy to do so to the tune of $800 POD in Lowell, MA.
This build will only work for a pair of ball-lock cornelius kegs. Not pin-lock. Not converted pin-lock-to-ball-lock (the shorter, fatter ones). Not commerical (Sanke) 1/6 bbl logs. Only homebrew ball-locks. The Slimline Torpedo kegs might work, but I don’t think the regular ones will. This fridge is perfect in that it fits this purpose beautifully. Unfortunately, it is uncompromising on what it can be used for. There simply isn’t room.
Parts List
The Fridge
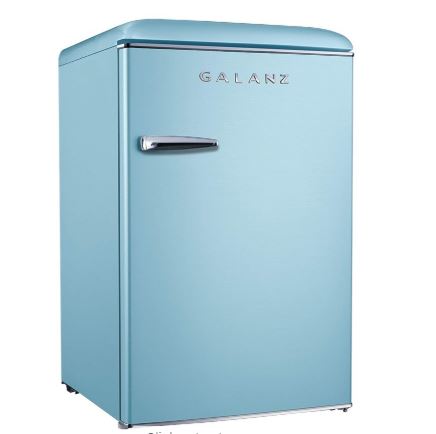
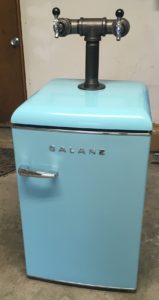
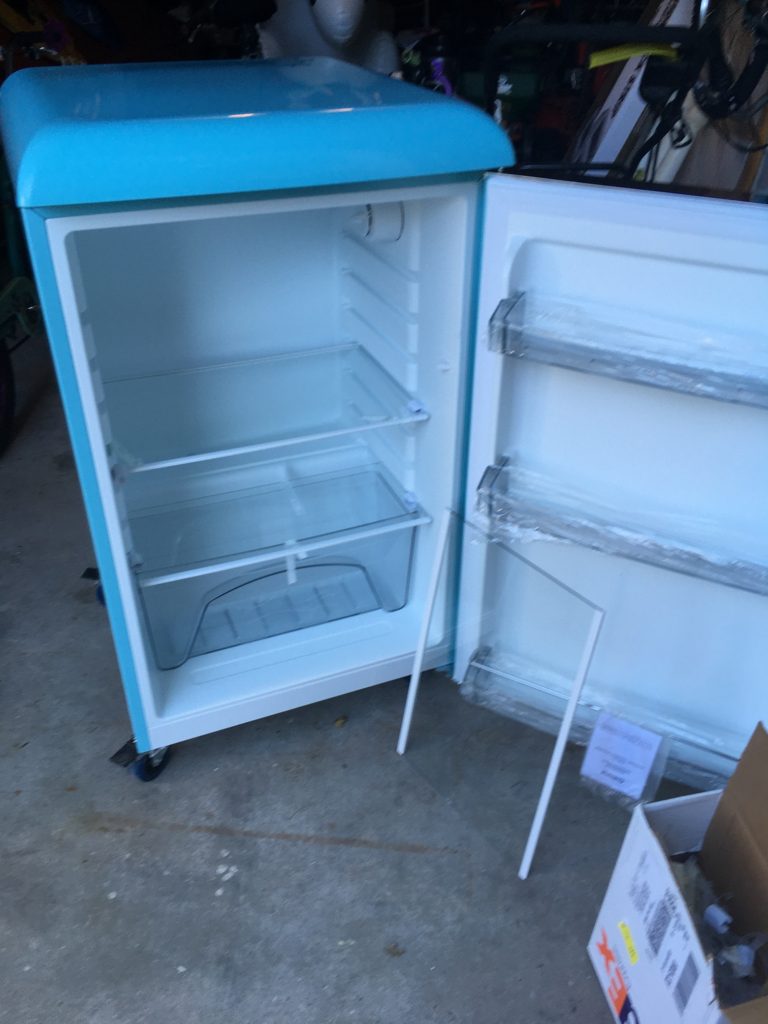
The GALANZ retro compact refrigerator 4.4-cu ft Freestanding Mini Fridge in Blue is exactly the right size for this build. The internal dimensions are precisely 18 1/2″ wide (narrows to 17 1/4″ at shelving grooves), 10″ deep where the kegs sit (deepens to 16 3/4″ above the shelf), and 28 1/2″ tall. Once again, this is perfect for two Cornelius-style ball-lock kegs as each keg is 8.5″ in diameter and 25″ tall. The retro styling is pretty fleek, although I do wish that the top was made of metal instead of plastic. The box itself is metal, so there’s that.
Cast Iron Tower
This is based on 2″ black/cast iron pipe. You should be able to pick it up at your local hardware store. I recommend Lowe’s because that’s where you can find the fridge. Also, during the pandemic, Lowe’s encouraged struggling small businesses with a $25M grant program. Then they more than doubled doubled down with a $30M addition. If you can’t find what you need there (I couldn’t find links online), your nearby Ace Hardware is locally-owned (linked to images). Prices are of August 2020.
Draught Components
Customizing your draught system is fun! You’ll need two of whatever parts you choose. Pick one from each of the following lines:
Shanks
Faucets
Tap Handles
Liquid-side Ball-lock Quick Disconnects
Kegs
Gas-side Ball-lock Quick Disconnects
And just one of each of the following:
Consumables
Useful Tools
- Utility knife
- Sawzall with metal blade
- Skill saw to cut plywood & door material
- caulking gun
- 7/16″ drill bit and a variety of ½” & smaller ones
- 1″ spade drill bit
- Oetiker crimping tool
- 1″ or larger adjustable wrench
- larger pipe wrench that can handle 2″ pipe
- needle nose locking pliers
- shop vacuum
- wire brush
Building the Kegorator
Assembling the Tower

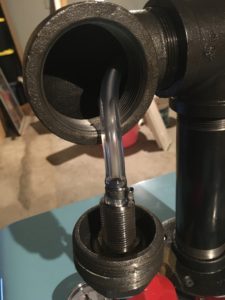
The bulk assembly of the tower is pretty straightforward. I recommend putting PTFE plumbing tape on the ends even if you never intend to disassemble in the future. Metal on metal will tend to rust. Having a thin barrier there will reduce the corruption of iron oxide. Screw the nipple into the flange and the tee. Attach the street elbows to the tee. Get them hand-tight, then go at least one more turn using the pipe wrench. Be sure to align them at the proper angles as they will become impossible to adjust in the future.

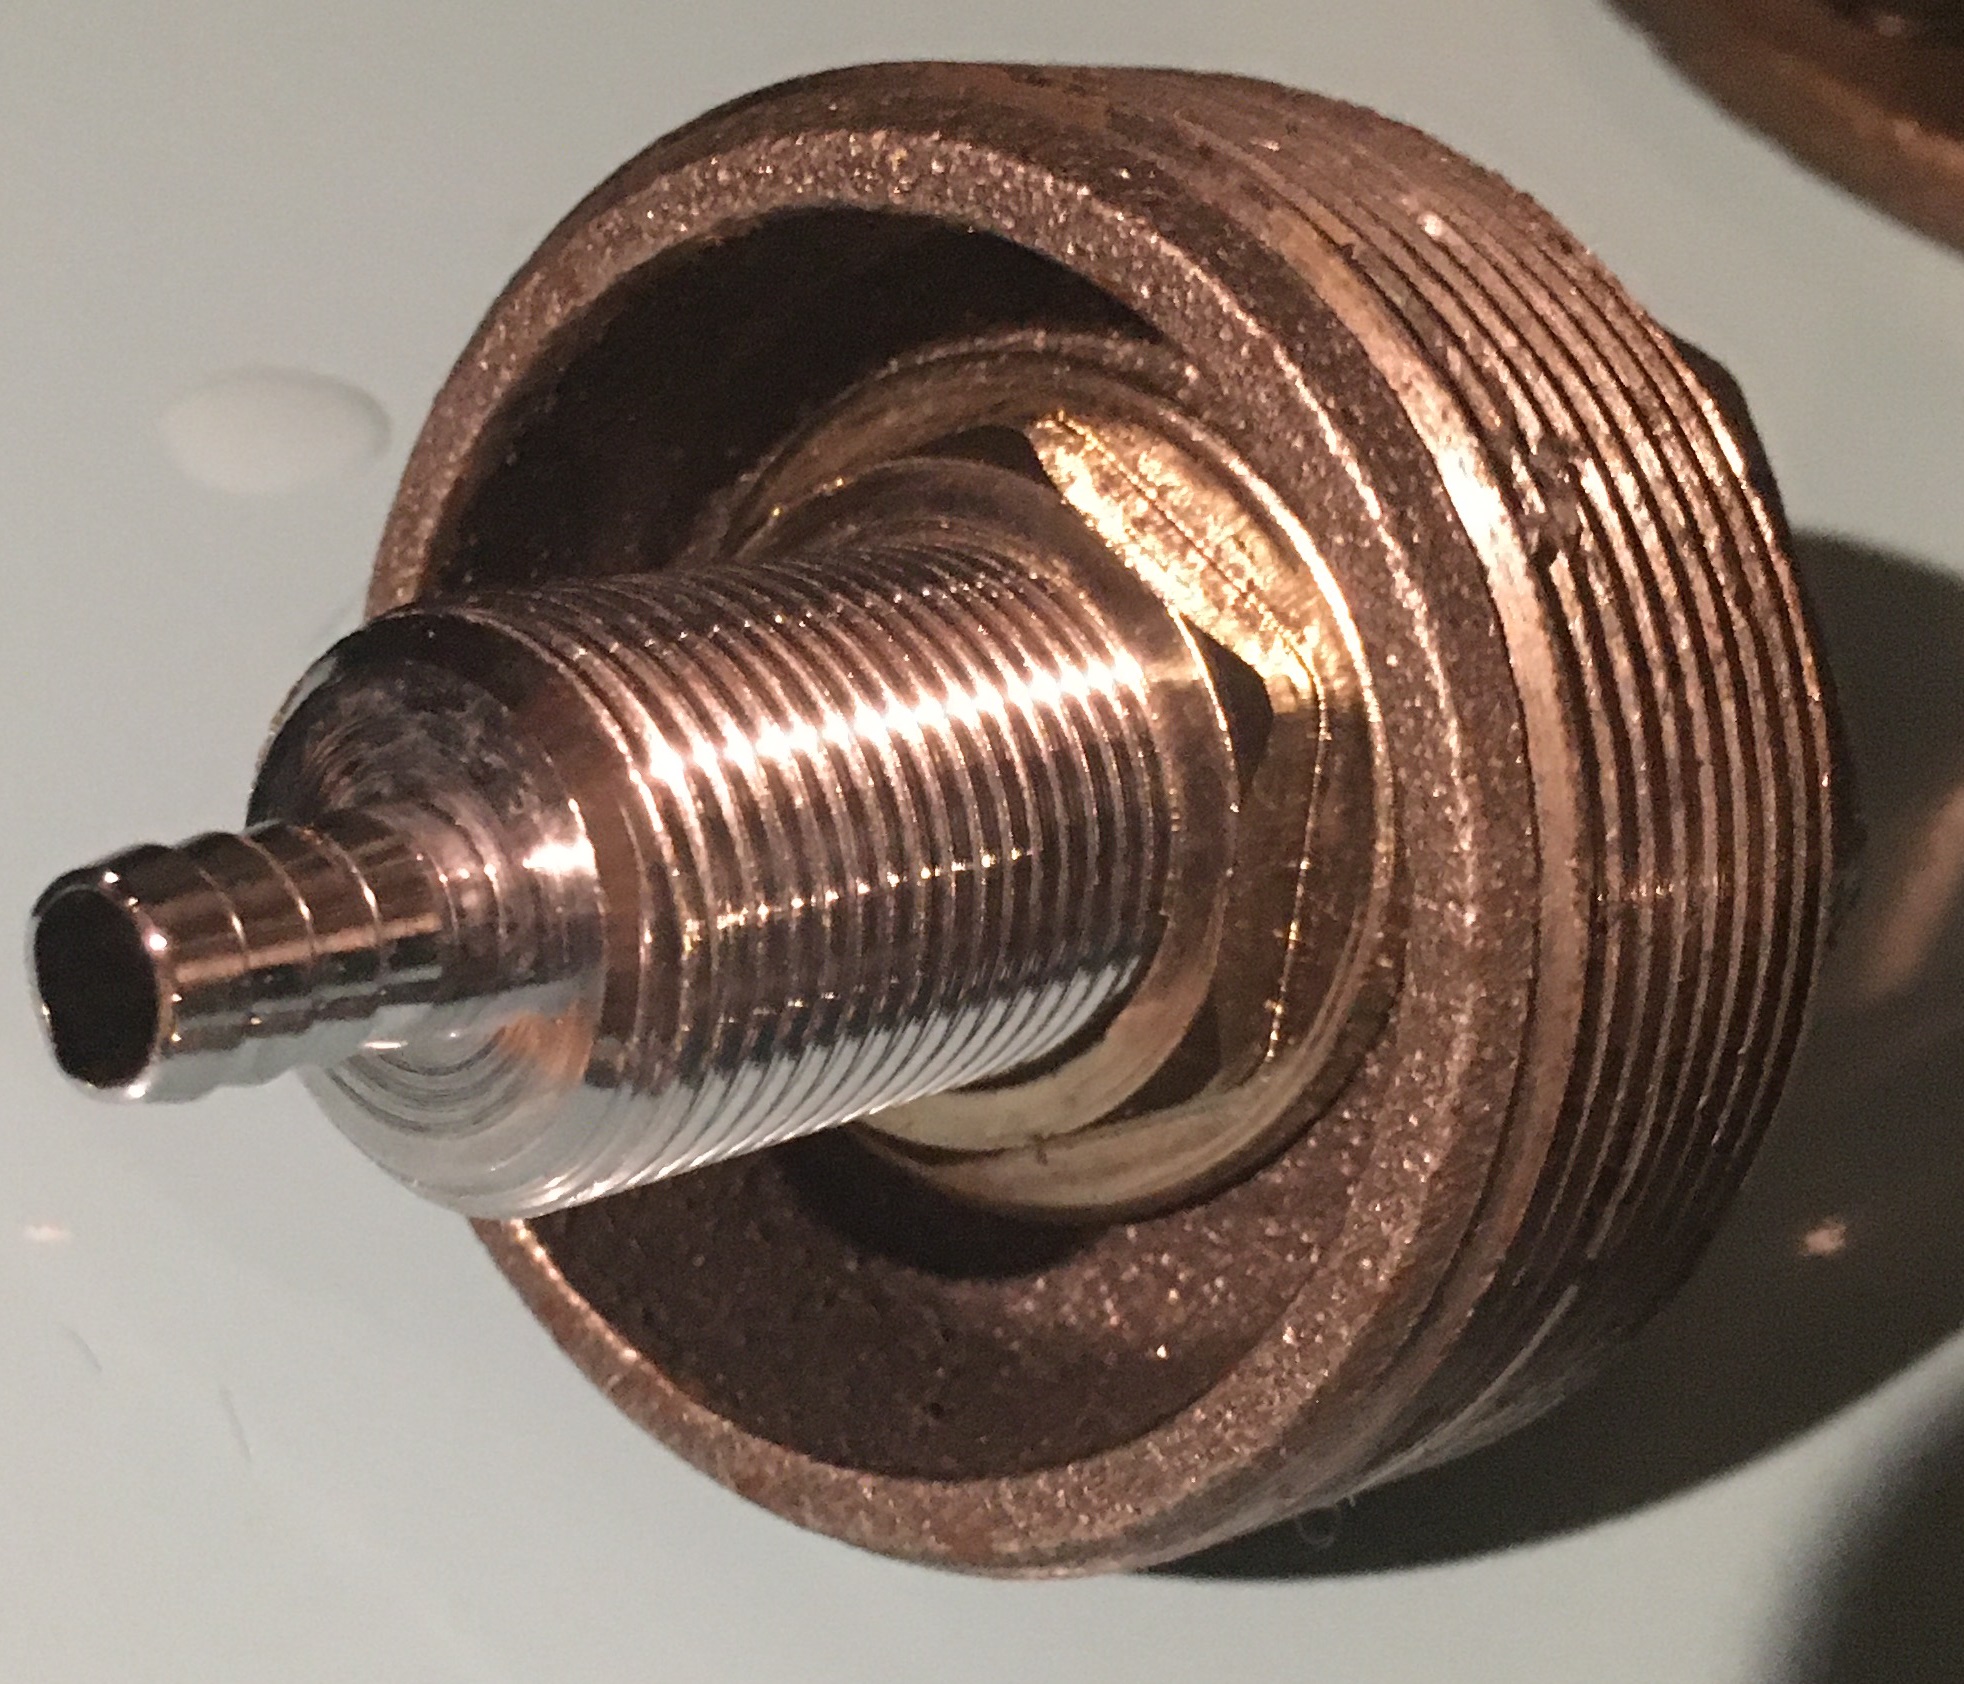
Assemble the faucet connection by passing the nipple shank through the reducing bushing. I replaced the plastic flange on the shank with the 1″ flat washer mentioned above. While the locknut that comes with the shank is sufficient, I’ve found that it tends to slip a bit, which is why I added the split lock washer to the setup. If oriented the correct way, it should only allow the locknut to tighten when fiddling with the attached faucet. A pair of needlenose locking pliers helps secure the locknut while screwing in the shank. I found that attaching the faucet and using that to help turn the shank helped.
Cut off two 6′ sections of 3/16″ thickwall tubing. Even though you don’t need the length to transport beer from the fridge to the faucet, having a 6′ length will help reduce foaming. Run the tubing up through the tower from the street elbow through the flange. Using a bit of hot water to soften the tubing will make it easier to jam it on to the nipple shank. Be sure to thread your oetiker clamp on before you do! Then just clamp the tube in place. I found it to be a good idea to mark each side of the tubing with color-coded electrical tape so that when I am attaching the tower, I can put the right tube on the right side (and the left tube on the left side).
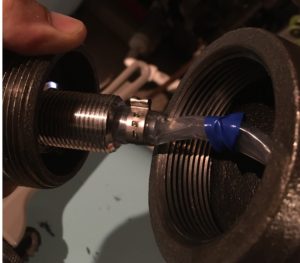
PROTIP: When screwing the shank/bushing assembly into the street elbow, try to allow the tubing to twist inside the tower as you do. If it gets caught up, it could kink and then when you go to proudly pour your first beer out of your new kegorator in front of your friends, nothing will come out.
Finally, stand your tower up in a well-ventilated area and clean it up as best you can with the steel wool and wire brush. Be sure to remove as much visible PTFE tape as possible. Dabbing with CLR may help if the rust is particularly bad, as may using a wire brush bit in a drill. Make it as pretty as you can so that it gleams! Using a bit of masking tape, cover the chrome collar on the shank. Then, spray it down with the clearcoat. This will prevent moisture from interacting with the metal and causing it to rust. Sure, there may be some on the inside but if this fridge is still functional by the time the rust eats its way through, I’d say you had a pretty good run of it!
Prepare the Fridge
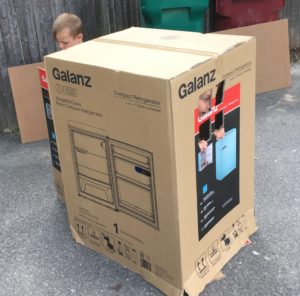
I found this fridge at Lowe’s. Transporting it in my vehicle meant that I had to put it on its side. Doesn’t hurt fridge but keep in mind that you want it to stand upright for 24 hours before plugging it in so that the coolant has a chance to settle back down to where the pump draws from. You don’t want to burn out your compressor on the first go!
I had a set of casters from another project and so secured them to the bottom. It was a bit of a pain but using some original holes & screws while making a few more and bolting them on, I think I got them reasonably well secured.

Because of the tight fit of the kegs inside, the molded door panel has to go. Fortunately, this was the easiest fridge I’ve ever converted! Follow along below:
Remove and Replace Door Panel
Open it up 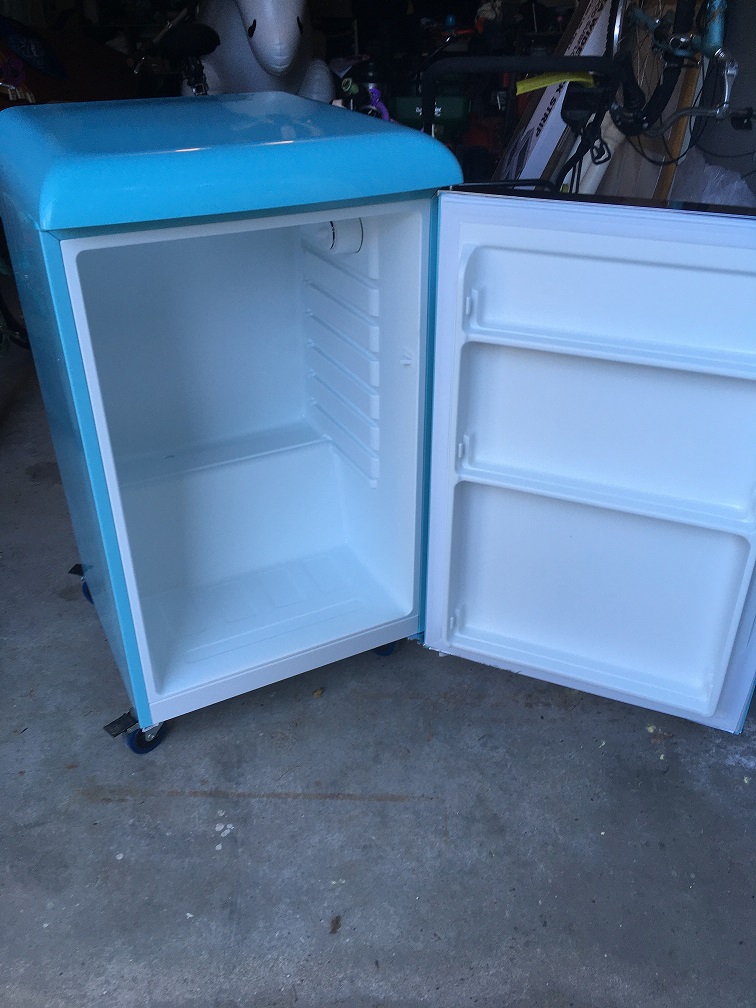
Remove shelving 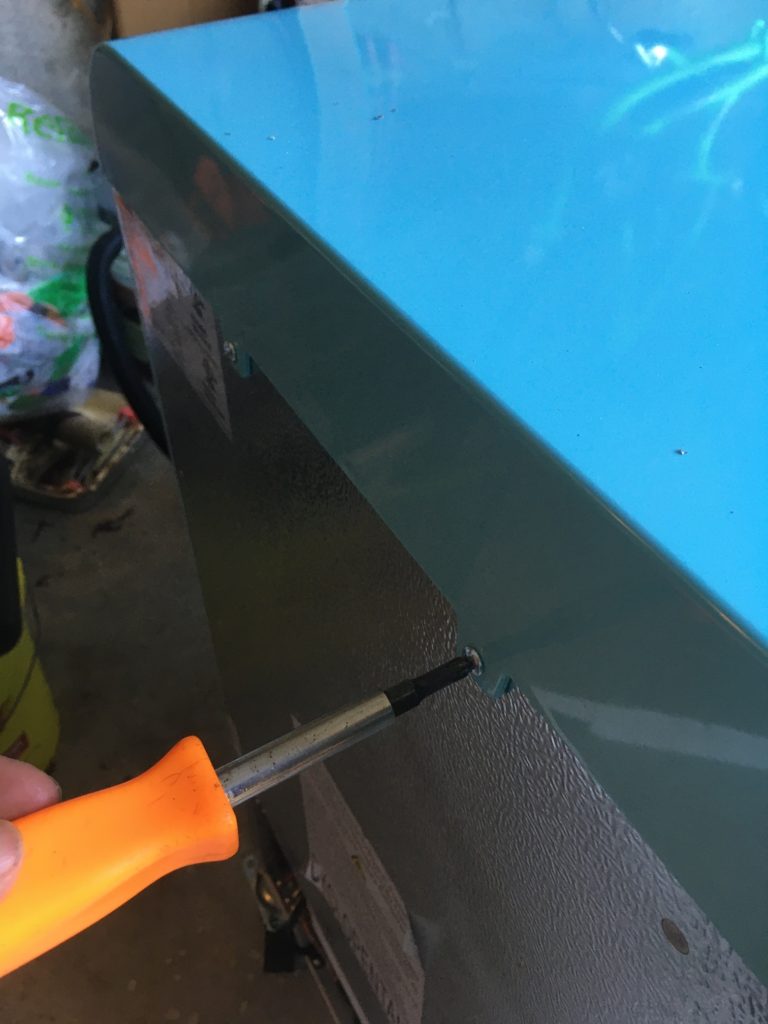
Remove two screws from rear of top. Remove top. 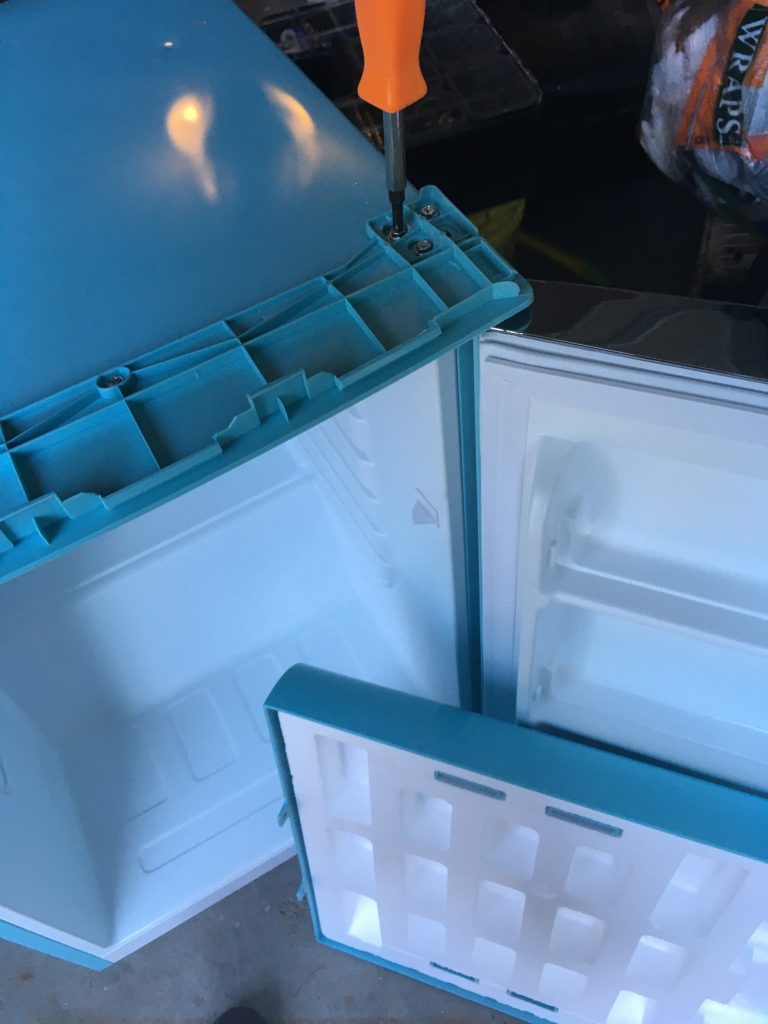
Remove 3 screws from top door hinge. 
Remove door. Use packaging foam to convert fridge top to work surface. 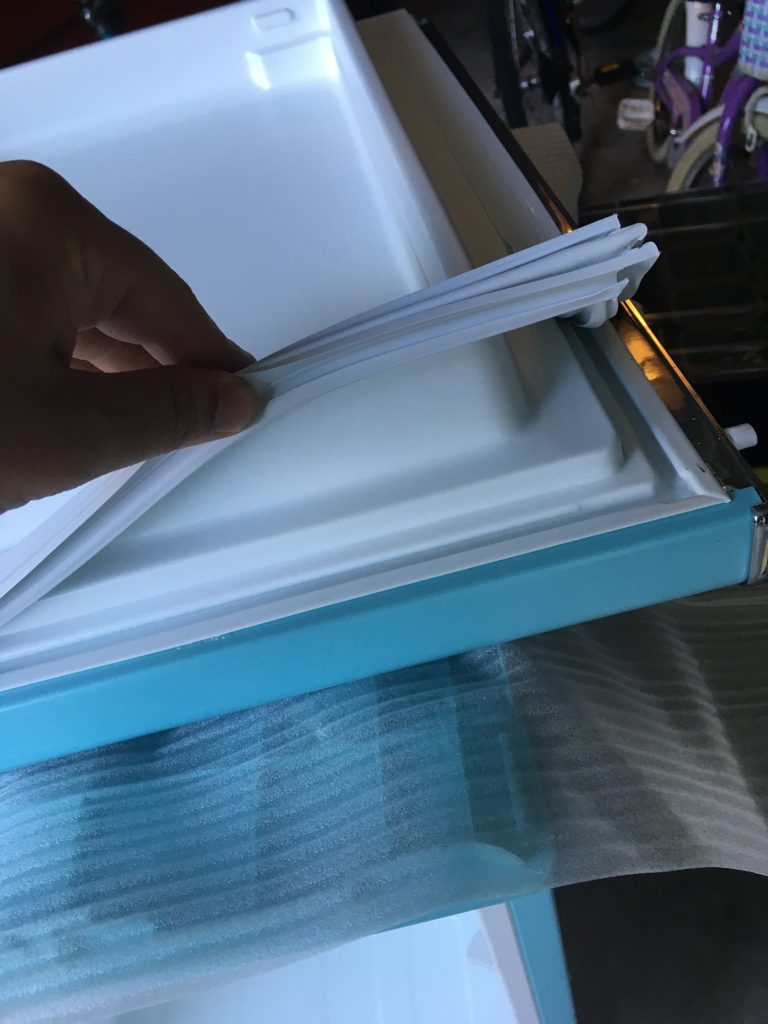
Remove door seal. 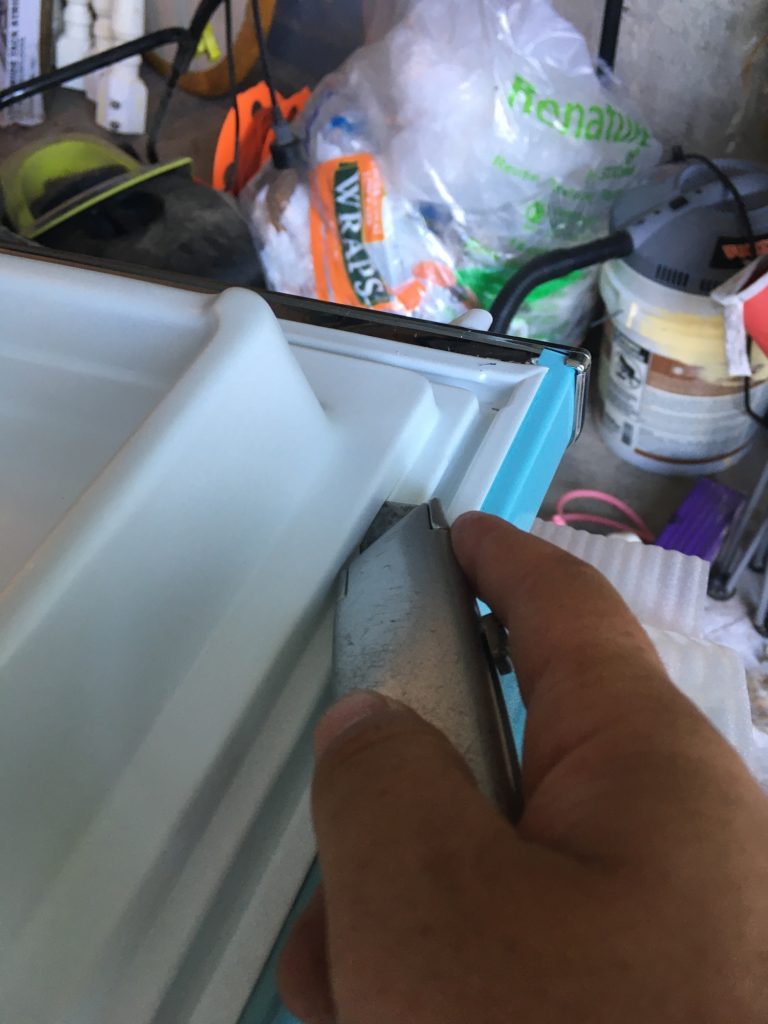
Slice bottom of moulding. 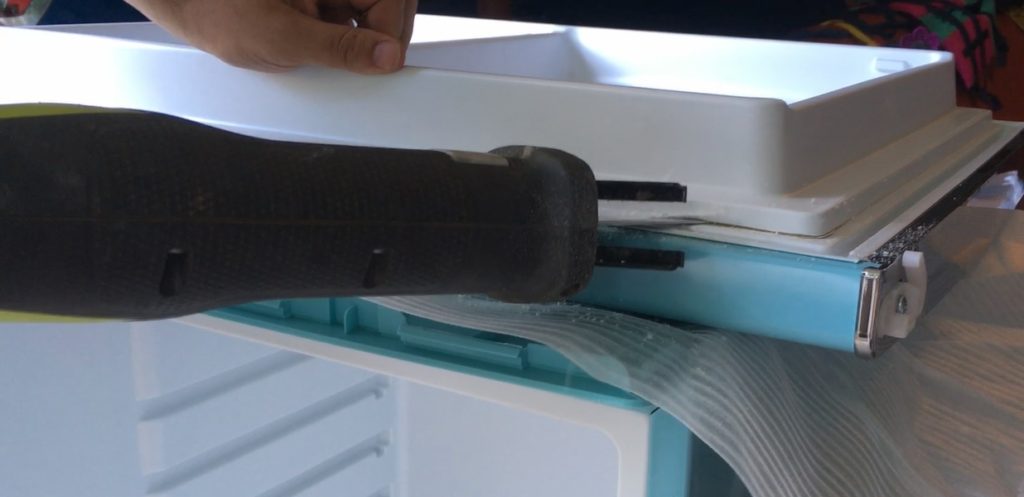
Cut where slices were made.
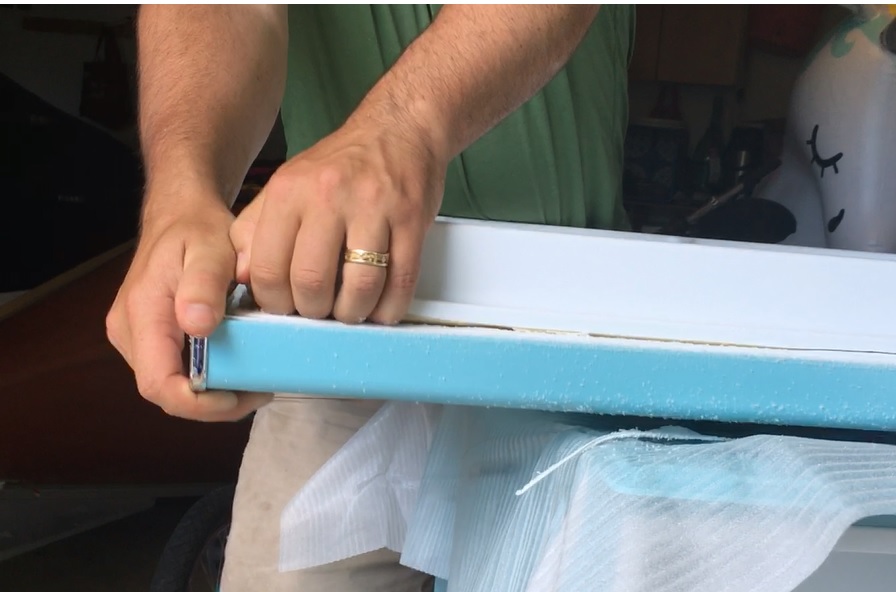
Remove the door paneling. There’s no easy way. Just tear it off. 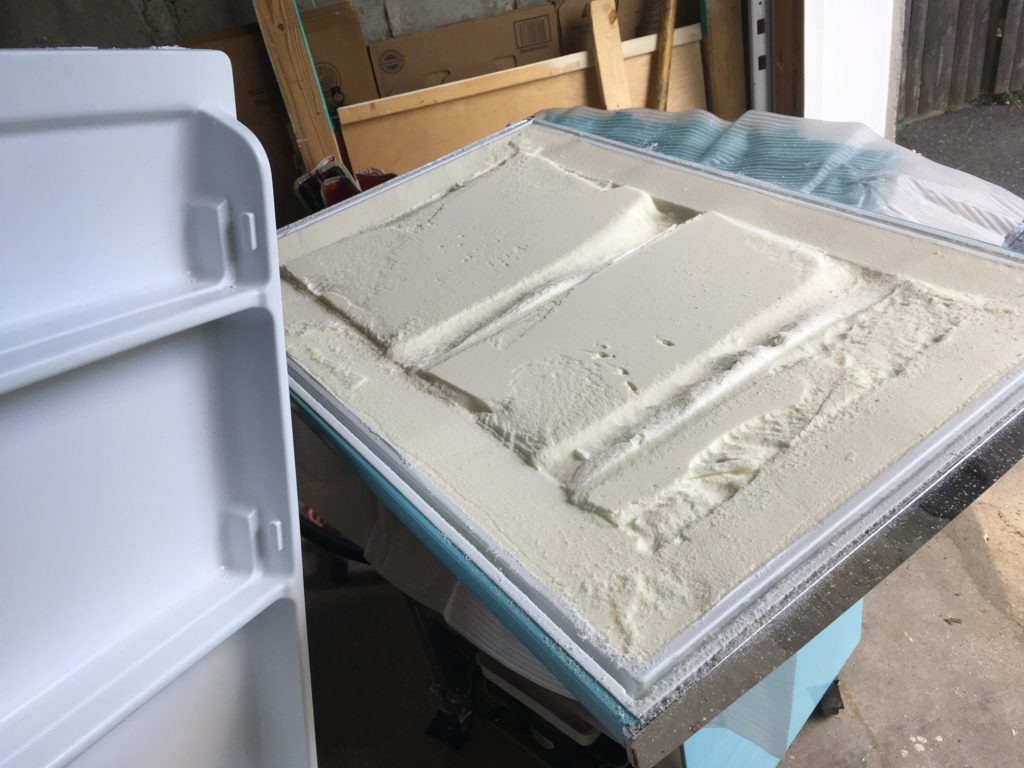
Between the cuts and the flat spaces it’s not too bad. 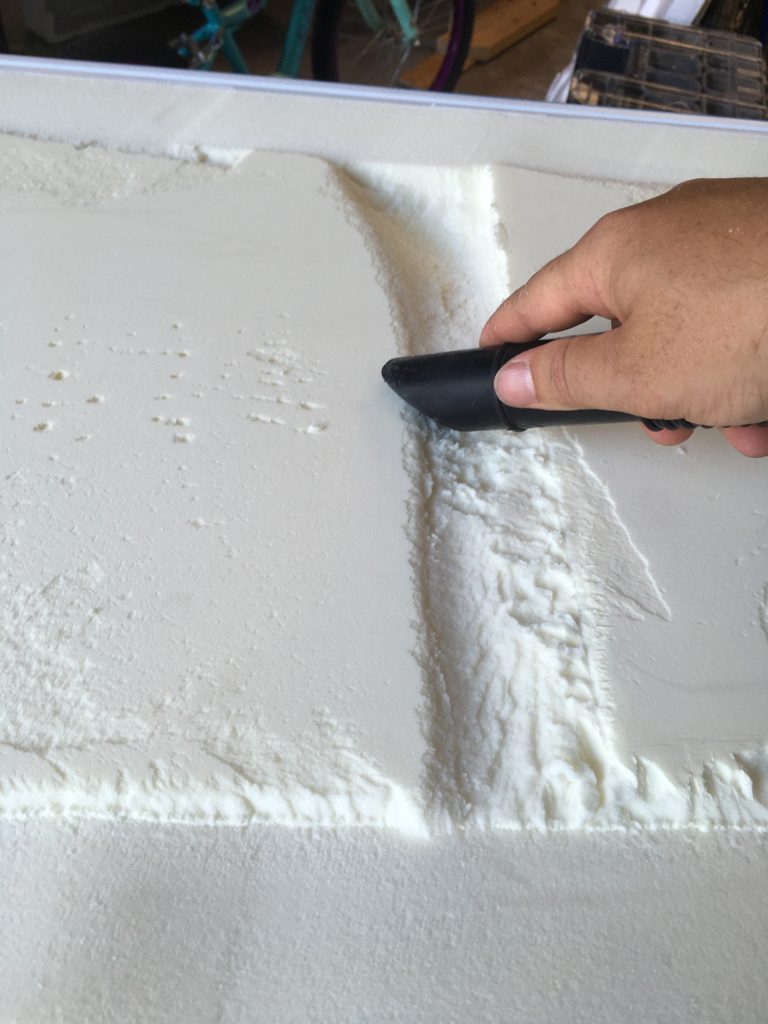
Use vacuum to clean up and reduce high points. 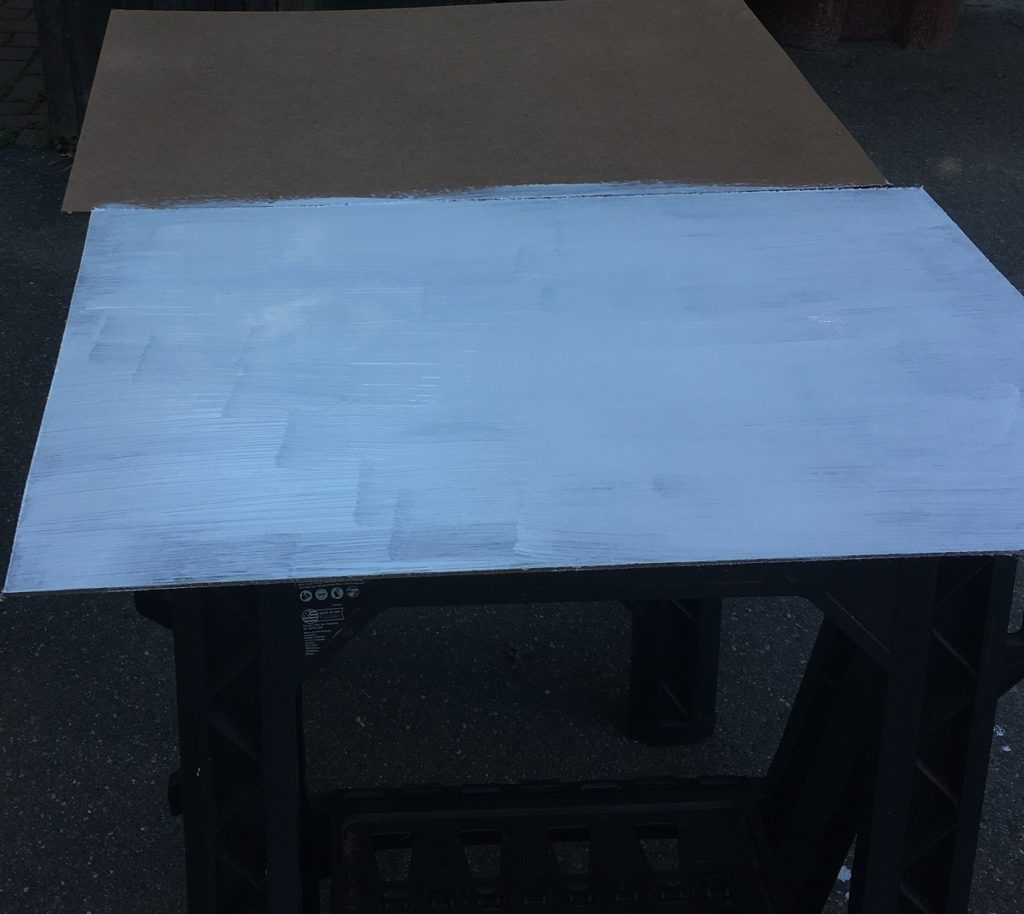
I painted & clearcoated some pressboard I had. 19½” x 29½” 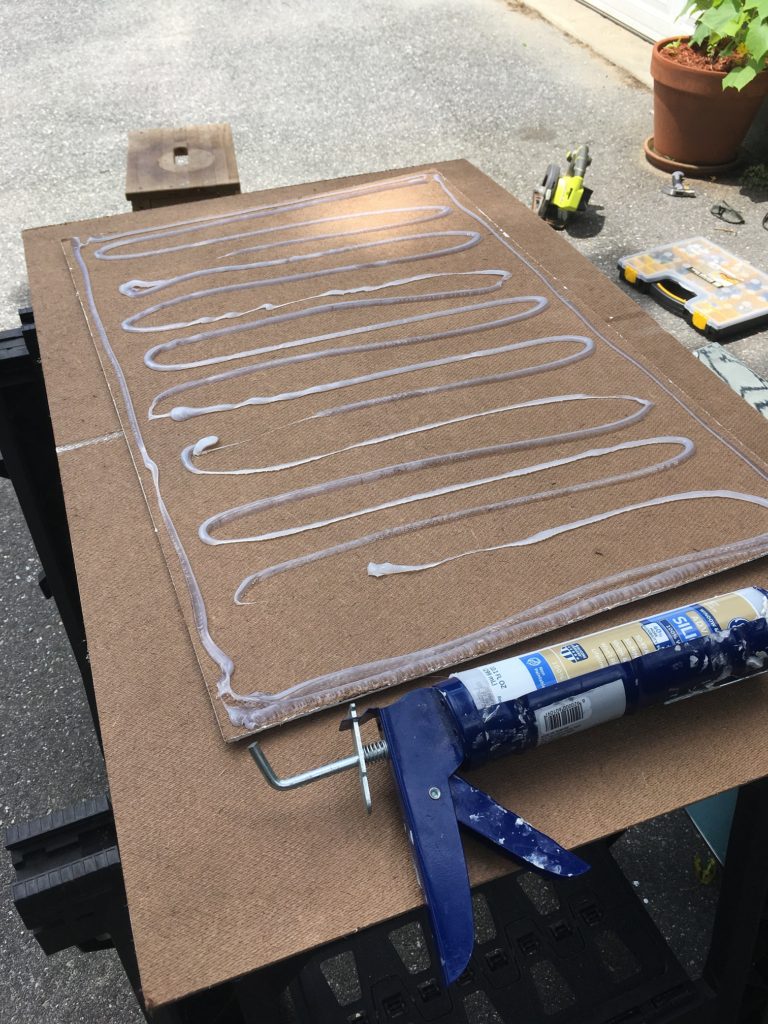
Silicone caulk. Mold-resistant for 10 years. 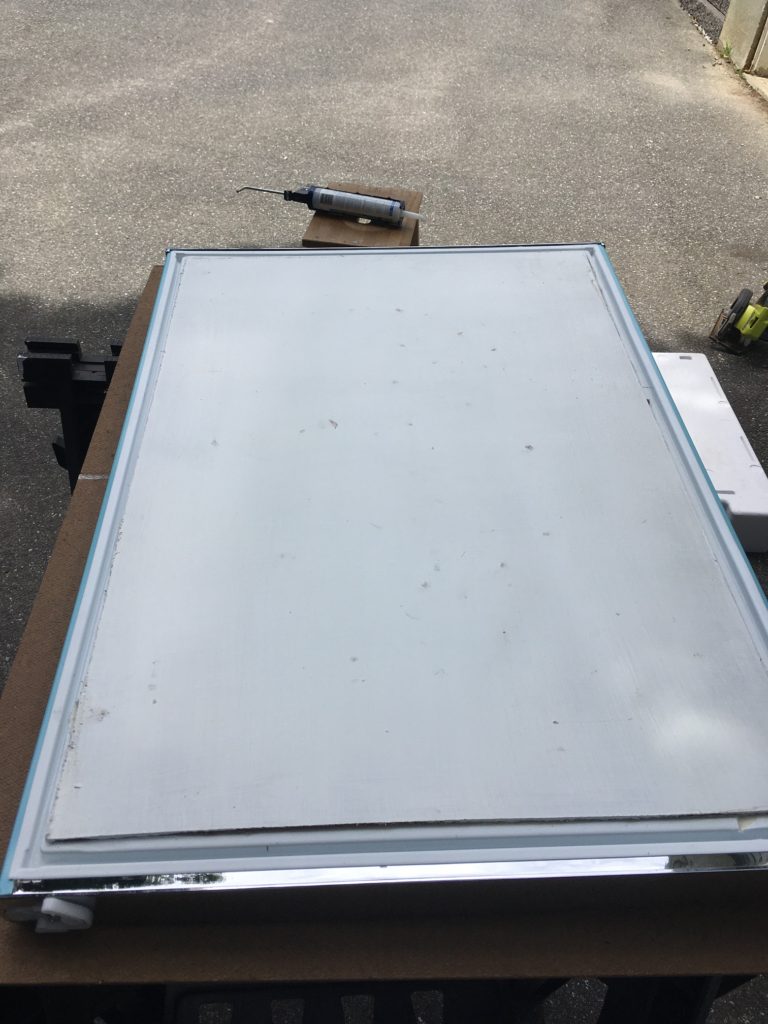
Position in place. 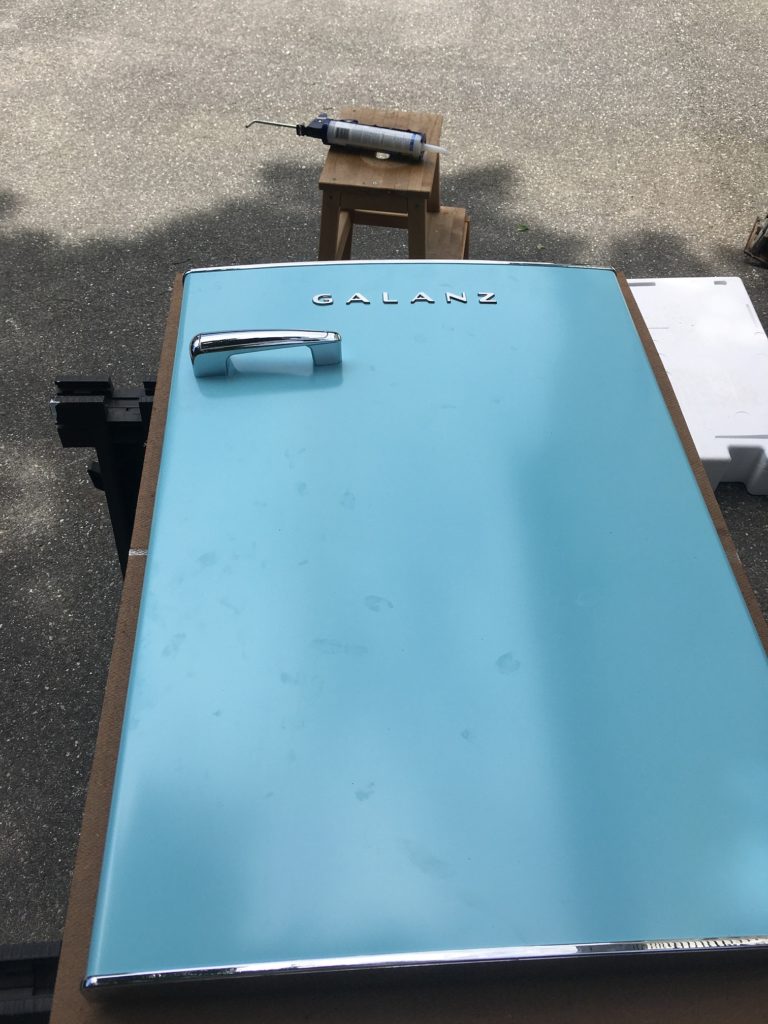
Let the weight of the door hold it in place while it cures.
Install Plywood Reinforcement Inside Top
The one thing I’m disappointed about in this fridge is that the curved top is entirely plastic. It is well-supported by an excellent piece of Styrofoam, which we’ll be making good use of. I just wish it was a more durable metal finish. Regardless of its make, it wouldn’t be able to support the torque on the tower in general use or when someone inevitably grabs it to move the kegorator.
The top is already off as we removed it to work on the door. Now, we need to install a piece of plywood to strengthen the top and give the tower something to screw into.
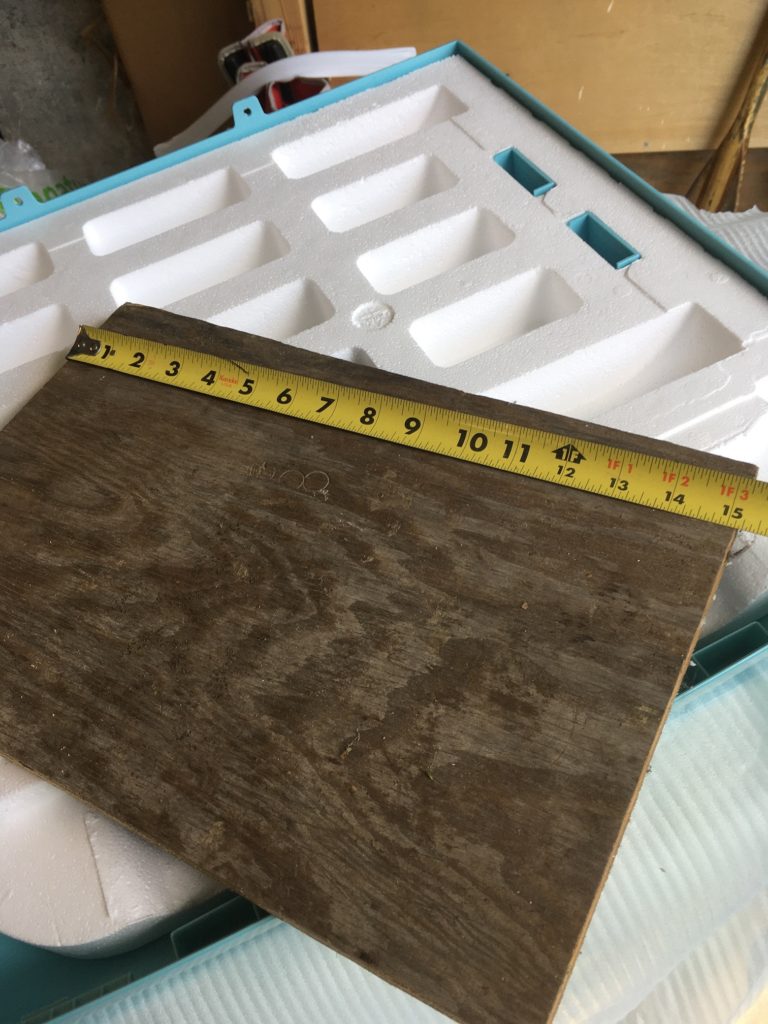
I had a piece of 3/4″ pressure treated plywood on hand. 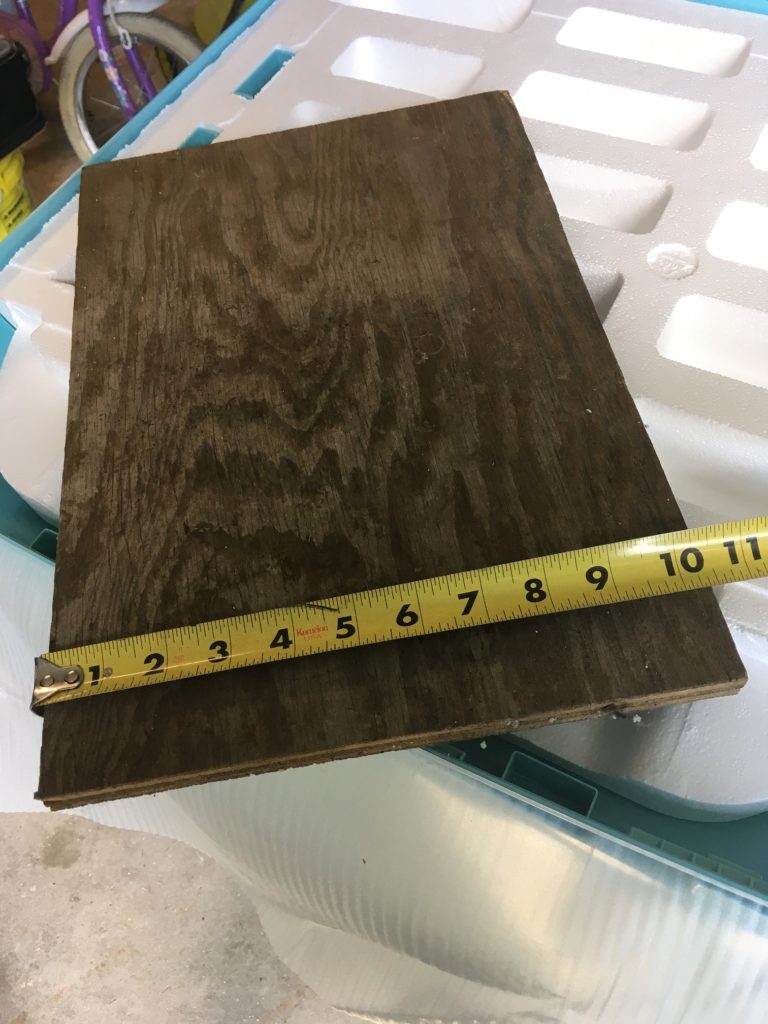
Cut it to 15¼ x 10¼ 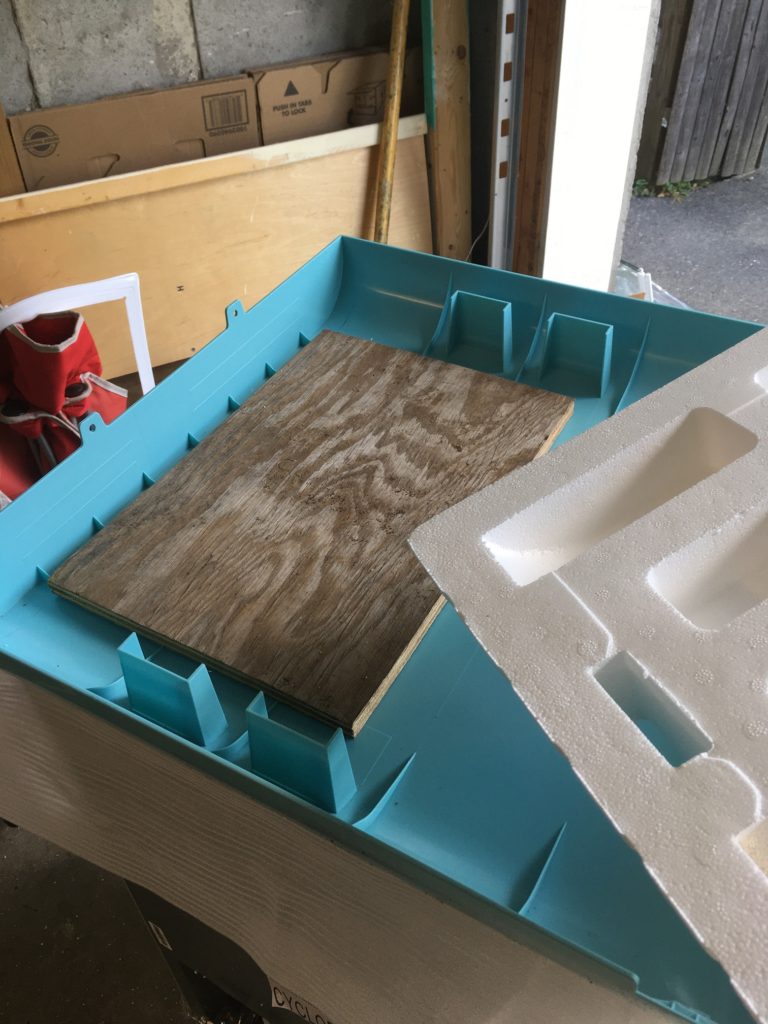
Nestles perfectly on the underside of top. 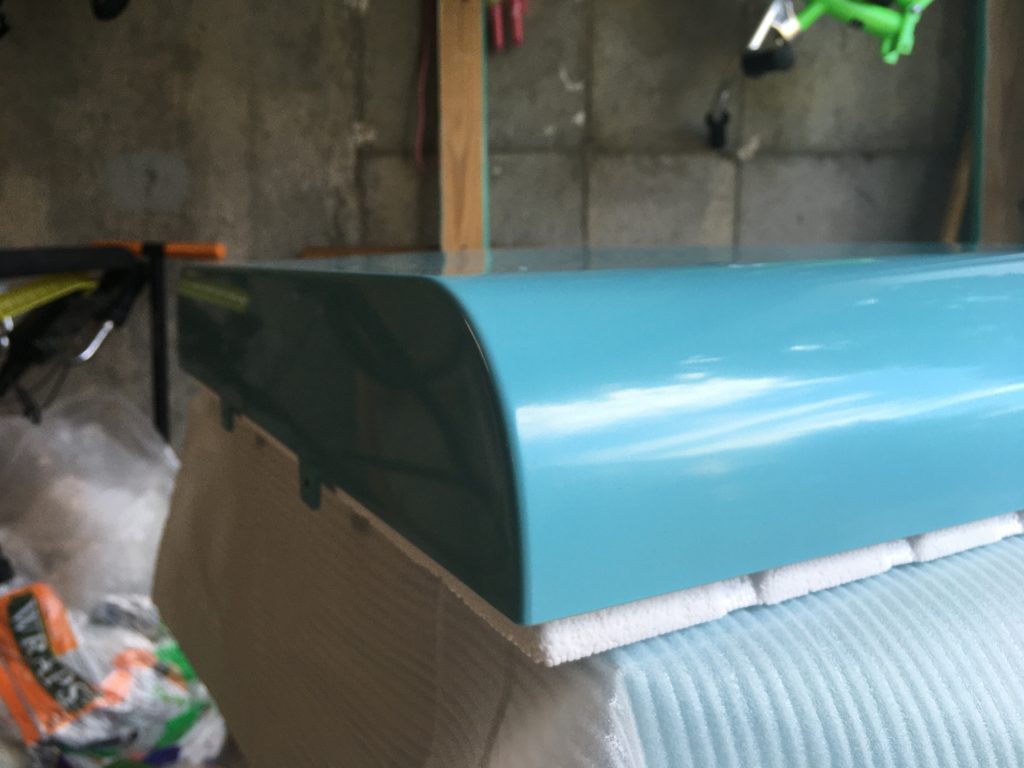
Replace foam to pin board in place. Flip over. 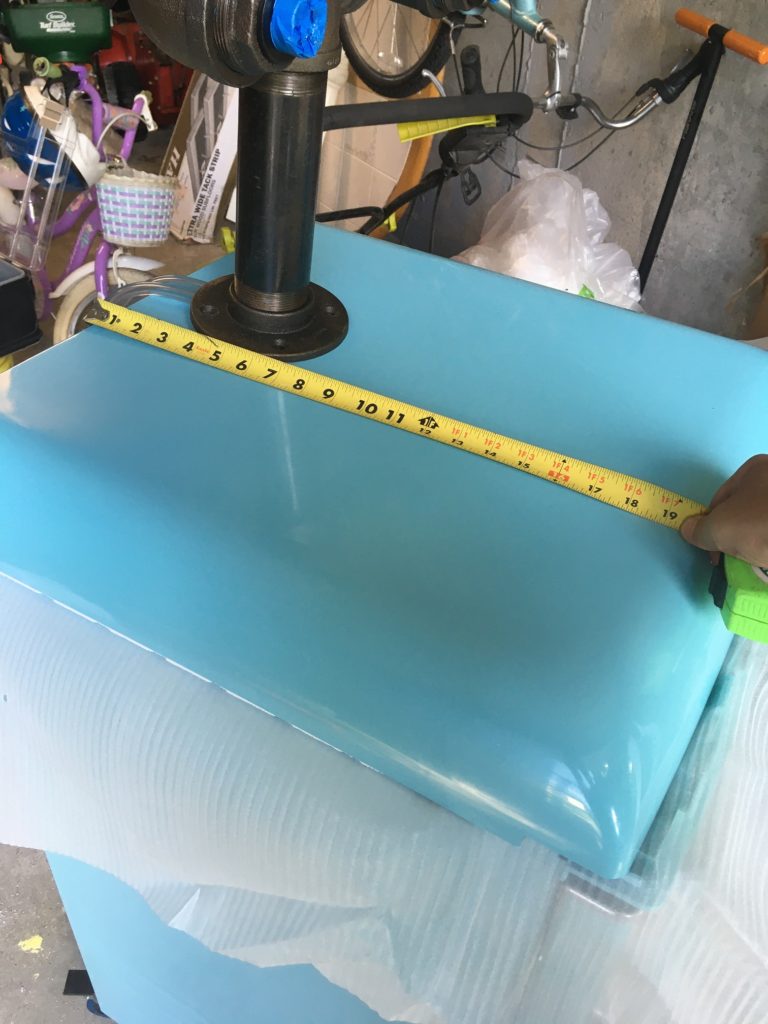
Measurement back to curve is ~18″ 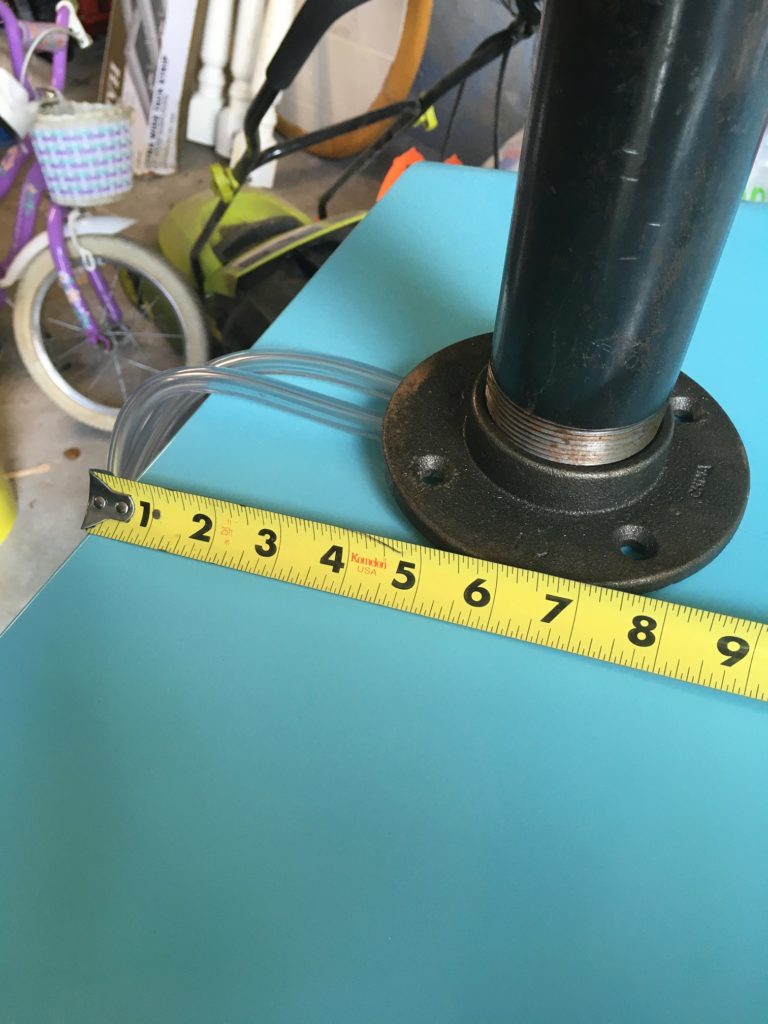
Positioned back of tower at about 6″ 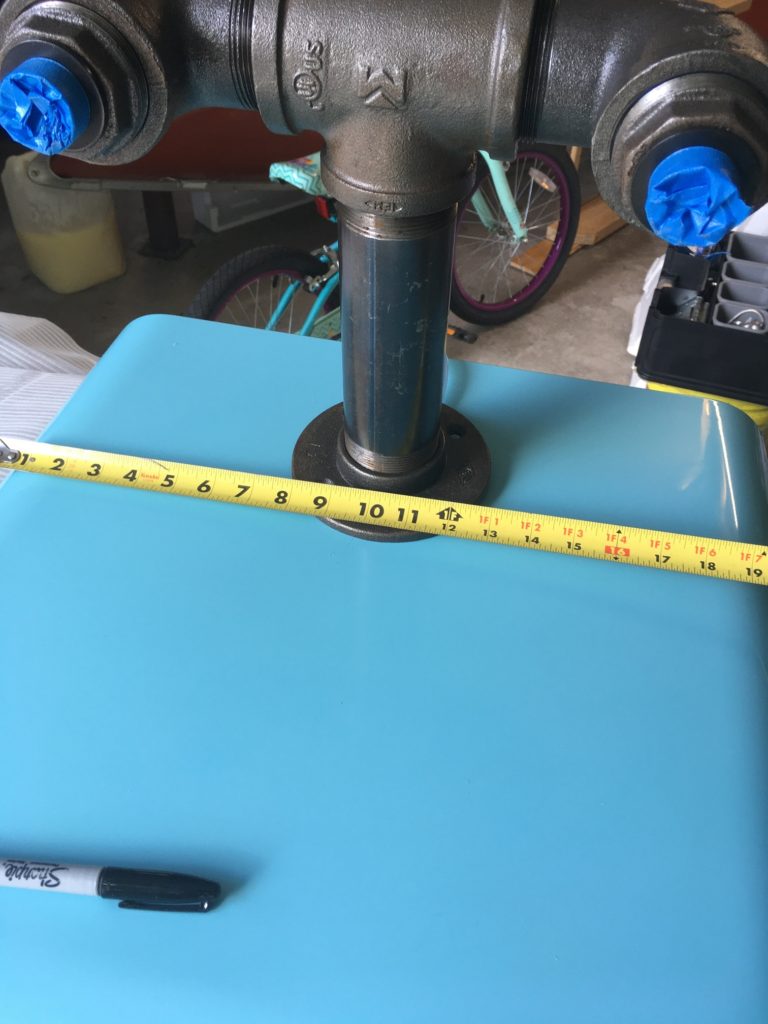
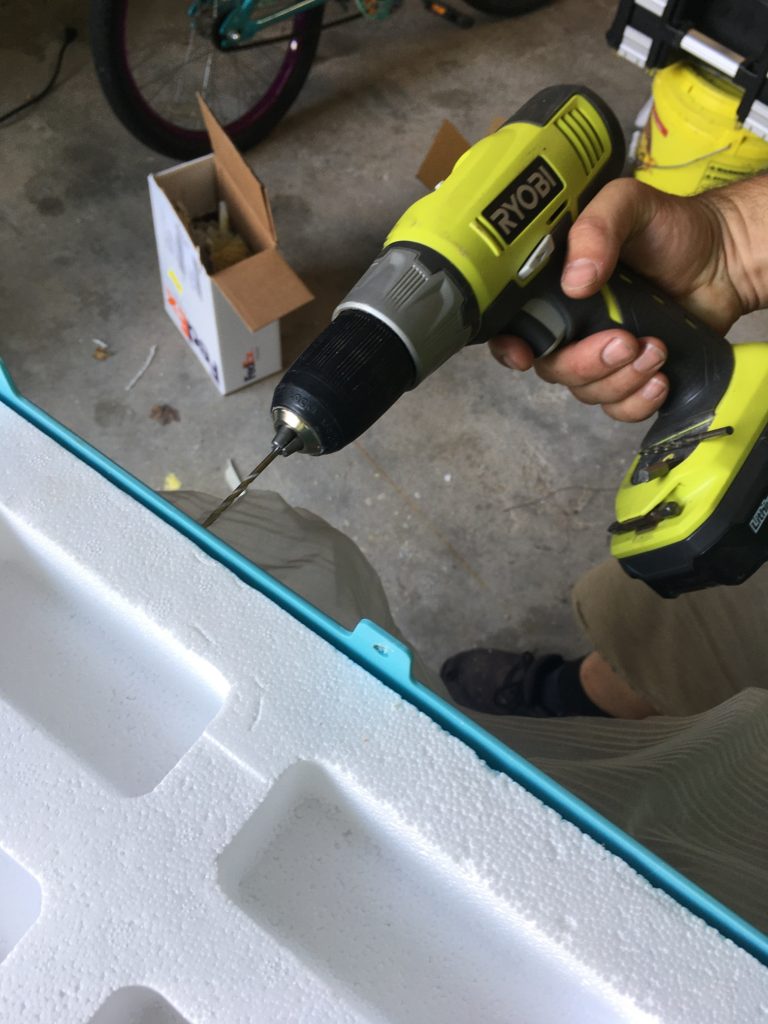
Side to side is 20″ so center is 10. Mark two FRONT holes in flange with marker. 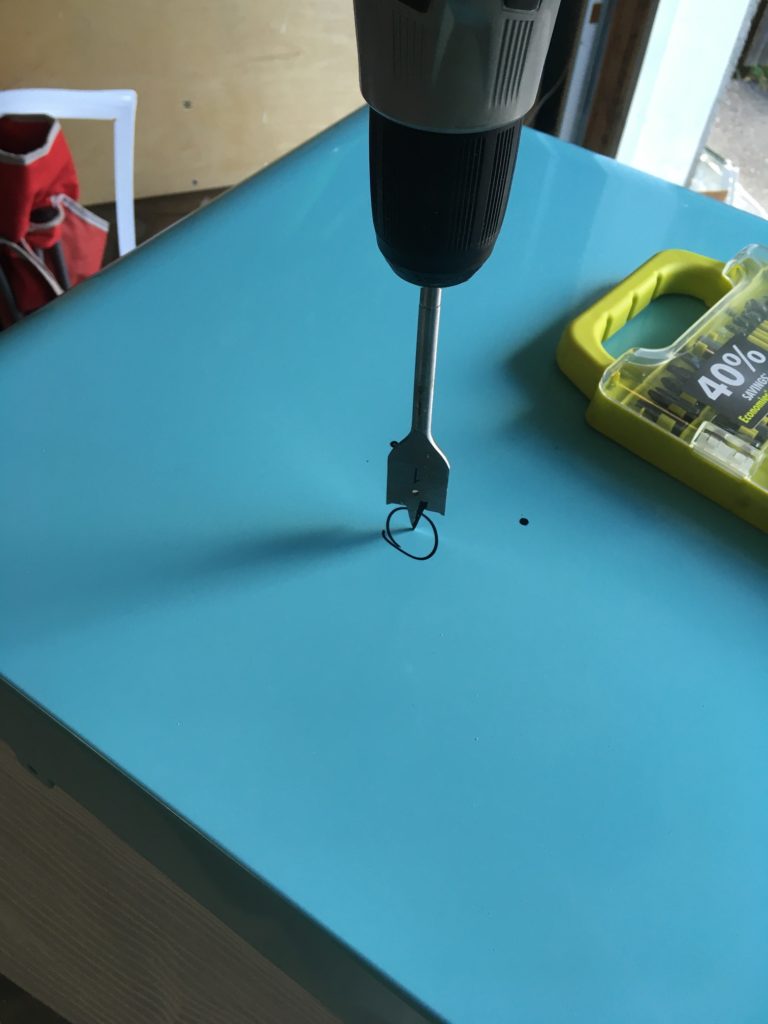
Drill 1″ hole under where tower will be. 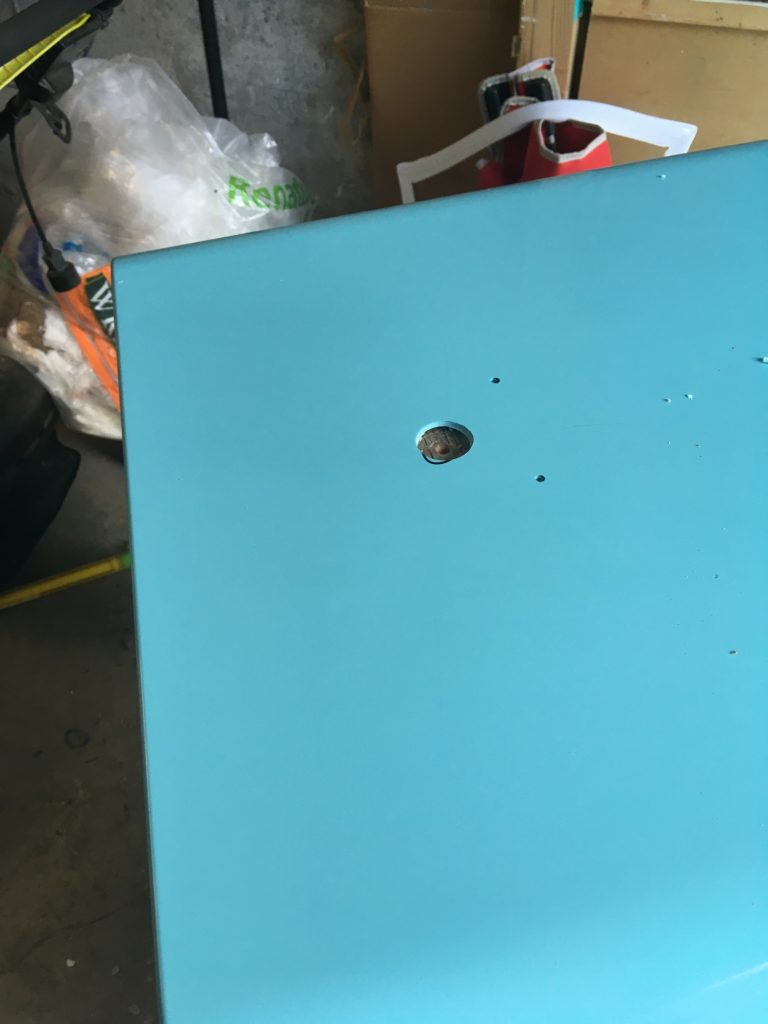
Shave out the plastic but don’t try to go all the way through the board.. 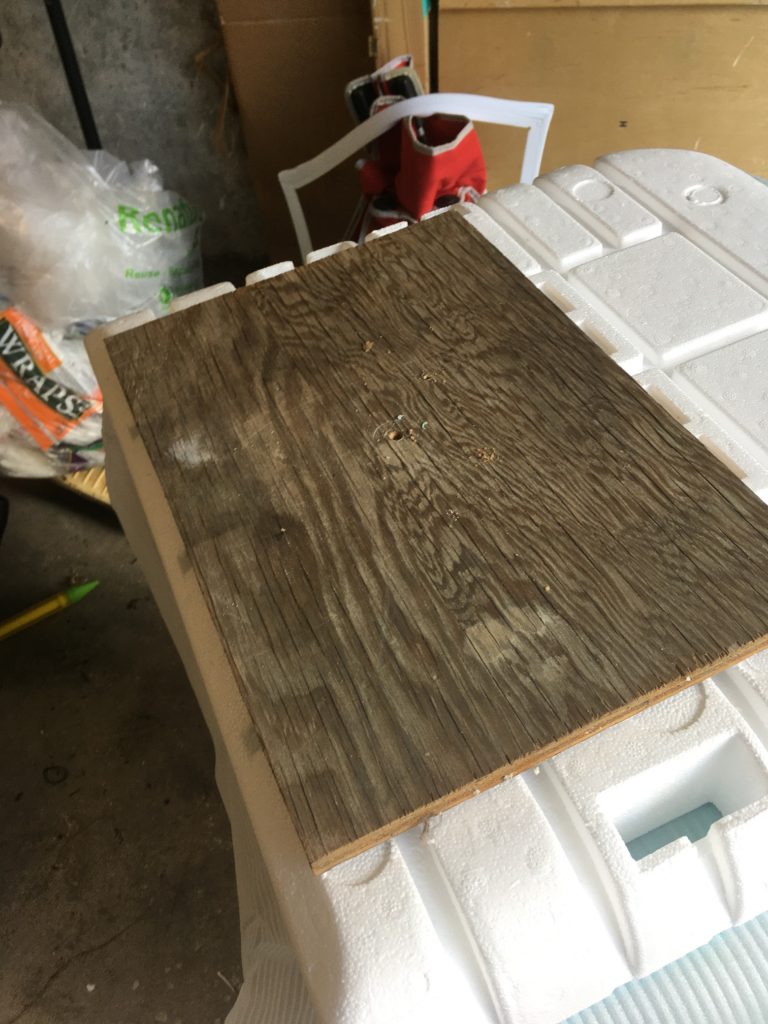
Remove plastic. Trace outline of board. Finish hole though board. 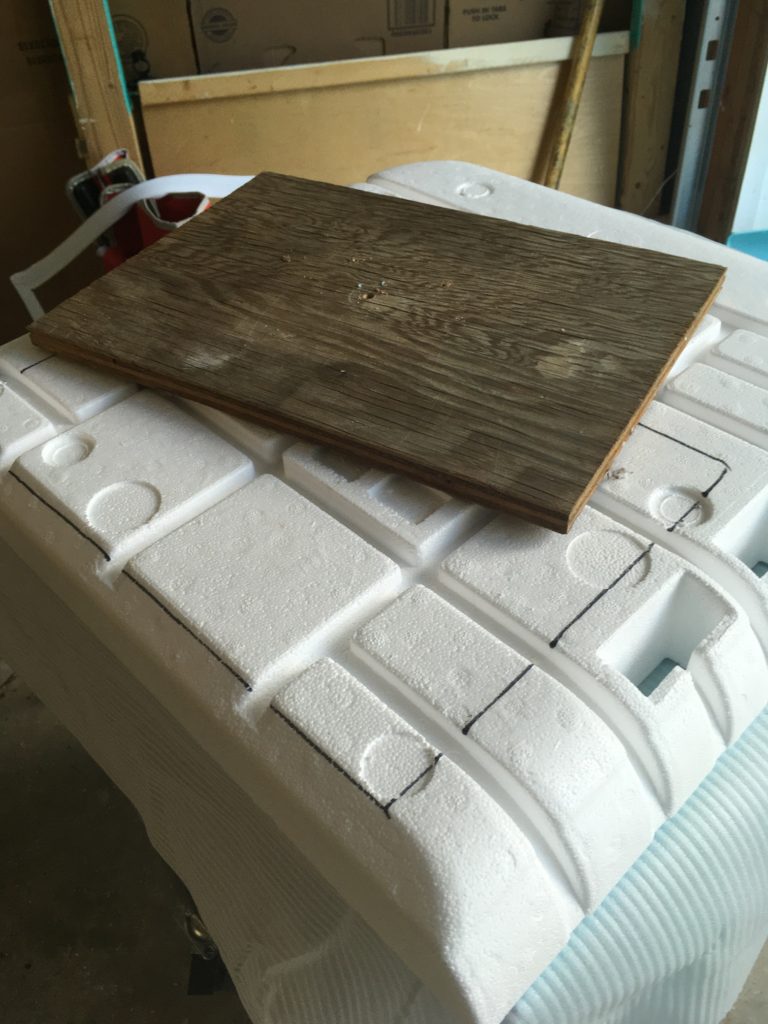
We’re going to be removing Styrofoam to recess board 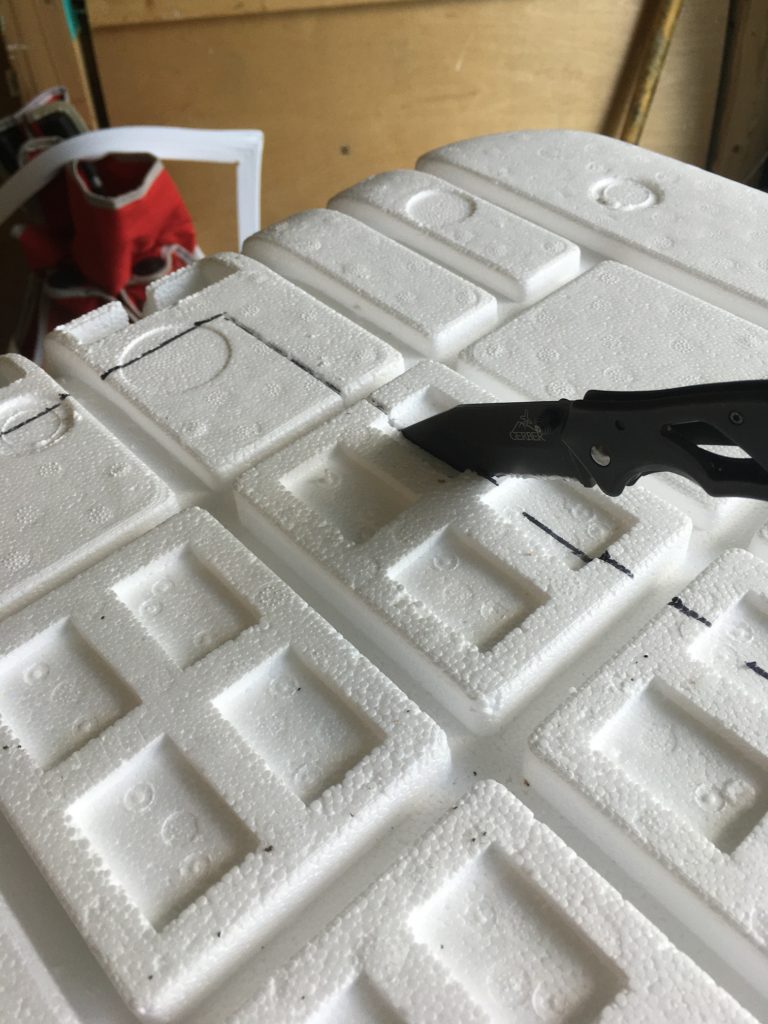
Just a sharp knife will do. 
Patience and persistence is rewarded. Try not to break through bottom. 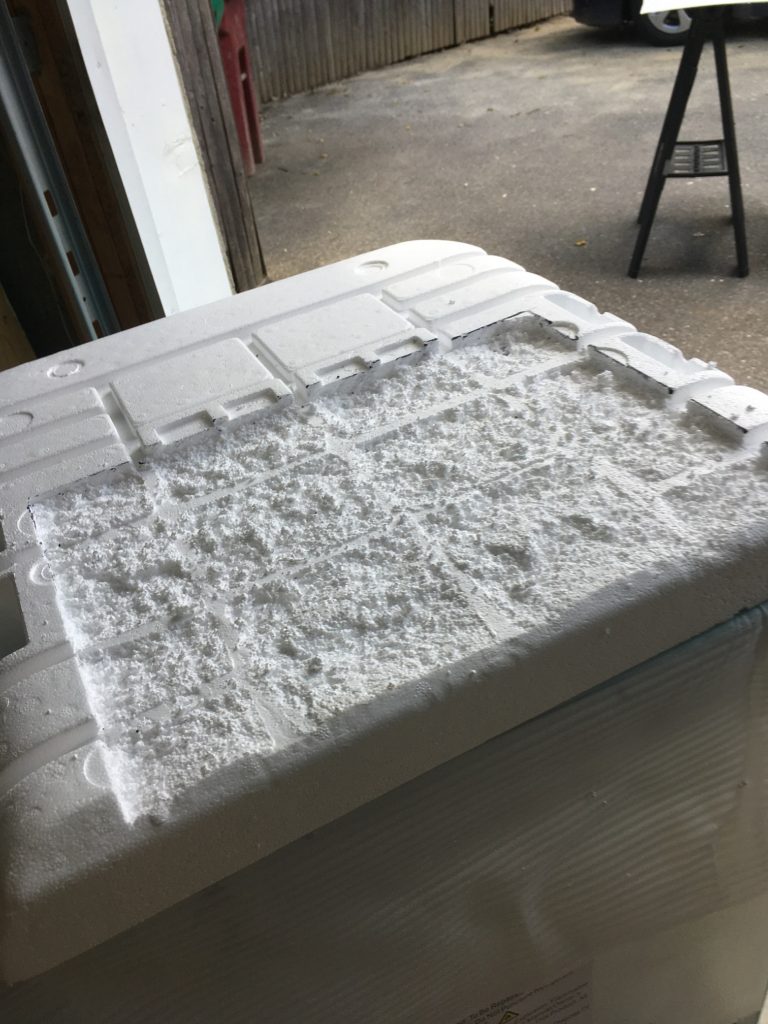
Clean it up with the vacuum.
Install CO2 distribution system
For the prototype, I just drilled a hole in the side of the fridge and called it good. Then I realized that I could make the CO2 inlet invisible without risking random holes.
Start by reinstalling board and Styrofoam. Flip the cover over so you can work on the underside.
Drill from center 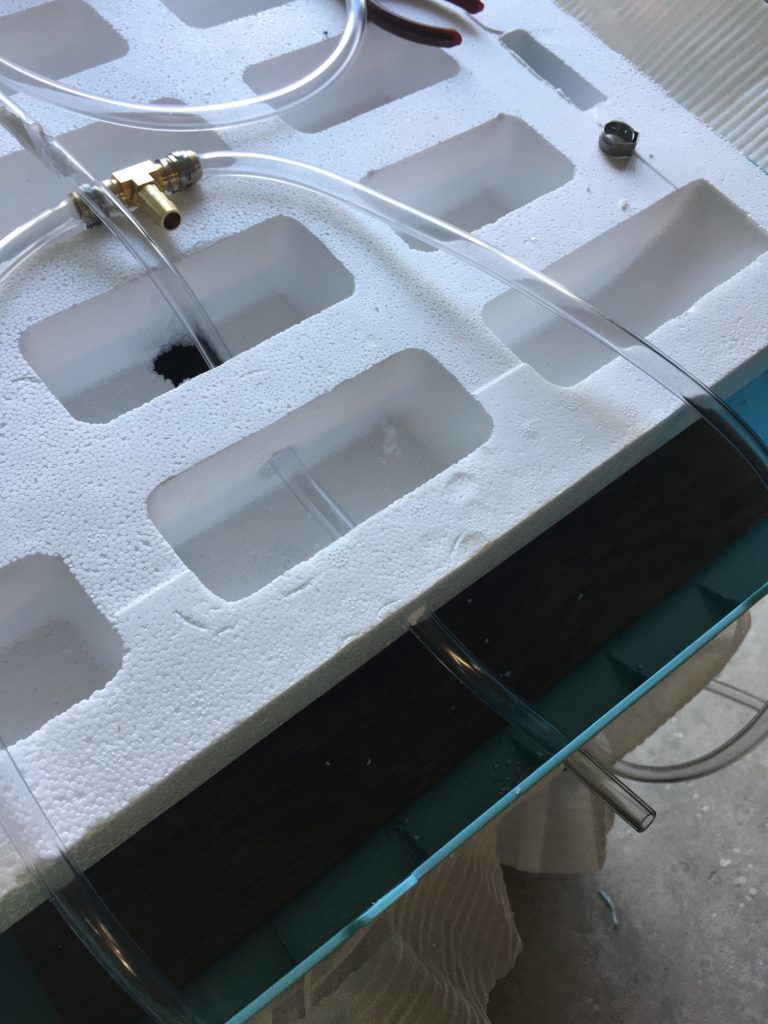
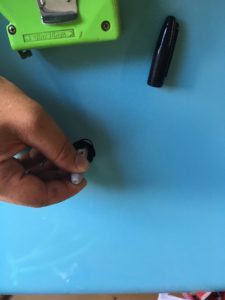
Feed line through. I used 3′ for each internal line and 4′ to the regulator. 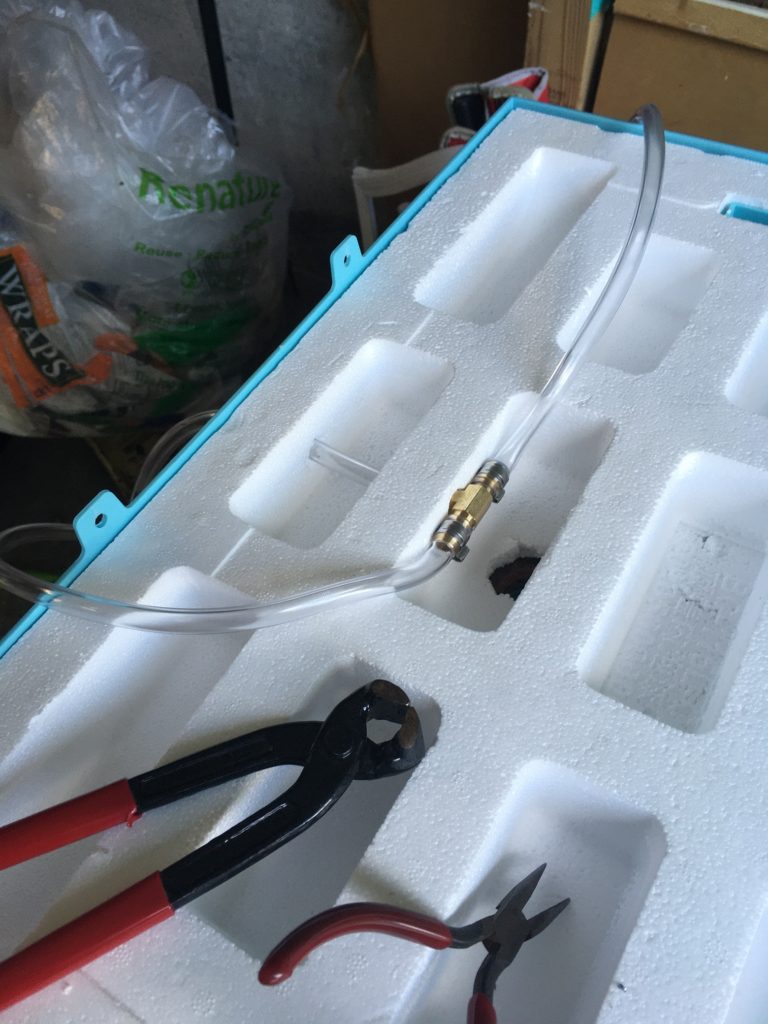
Crimp it all up!
The crimp and tubing from the regulator will hide out of the way. Use warm water to soften tubing as necessary.
Install the Tower
After all of this preparatory work, installing the tower is the easy part! Four more holes, just a little swearing, and it’ll be in!
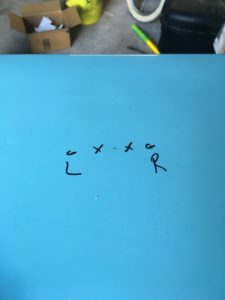
Put the top assembly back in place. Make a dot on the top of the fridge through the center of your tubing hole. This is roughly the center of your tower. Remove the top (again). I separate the liquid & gas lines for each tap as I like the keg to line up with the tap it’s being served from. It makes no difference but the aesthetic appeals to me. So, just to the Right & Left of your center dot, mark where the liquid lines are going. You want to give a little separation so that the 7/16″ holes you are about to drill don’t overlap. Give yourself about an inch to inch and a half between them. I marked mine L and R from the front so I wouldn’t put the lines in the wrong place.
While the picture shows the gas right in line with the beer lines, I ended up putting them in diagonally towards the rear. It lined them up a bit better with where the tee is installed in the cover while also getting the lines out of the way on the inside. The gas lines are only 3′ long, which is plenty to work with when loading or unloading a keg. For drilling the holes themselves, just use a small bit to drill a pilot, then follow with the 7/16″ bit. The cooling lines all seem to be on the back panel of the unit so that there’s little change of damaging something by drilling in the top. I prefer to use the tubing to seal up the hole but you can also supplement with a dollop of the silicone caulk. I standardized the gas lines to match the liquid lines so that I used the same bit. I also like that the thickwall will be a bit harder to puncture accidentally.
Finally, press your lines through. You’ll need to hold the tower and top while threading the liquid lines in. Pull them the rest of the way. Then pull through the gas lines. The top should be sitting in place with the lines extended inside. Just trim a bit off your tubing to remove any debris and install the gas & liquid-side ball-lock disconnects using Oetiker clamps.
Final Assembly
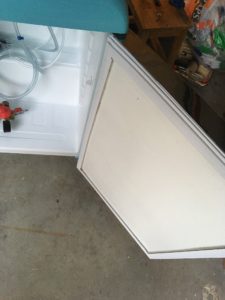
Once you’ve installed the tubing for the tower, final assembly is a breeze. Start by installing the door. The silicone should be cured by now. Pop the seal back in place and seat the door on its bottom hinge. Install the top hinge.
Snap the cover back into place. If your board was particularly thick (mine was), you may have to carve off a bit more Styrofoam near the front. Gently click the front edge back into place and push down gently on the back. If you can use the original screw holes, great! If not, carefully pilot a pair of new holes and pop the screws back in. Kegorator is now assembled!
Attach the regulator to the CO2 tank, then to the tubing coming out of the back. Pressure-test the system so that you don’t waste an entire tank of gas!
Move Thermostat
One last thing. You’ll notice when you pop your first pair of kegs in that the thermostat is in the way. D’oh! I don’t see any need to replace the stock one so that I can serve beer at precisely 34.2’F but it does need to be moved. Fortunately there’s enough wire to tuck it neatly in the back corner.
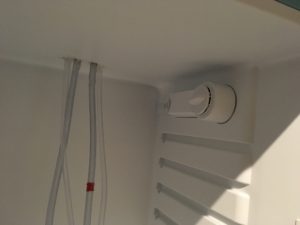
Start by using a flat-head screwdriver to pop off the cover for the light. Just a little pressure and it should come right off. There’s a small Phillips screw in there. Remove that and the unit will pop off. Carefully pull it away and rotate counter-clockwise, bunching up wires as you can.
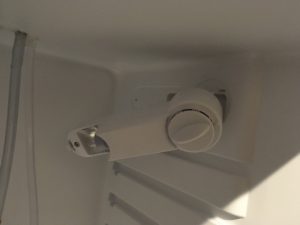
Pull gently away and rotate CCW. 
Install vertically. Wrap wires to protect.
Wrap the exposed wires with the rubber electrical tape. This will help protect them. I drilled two small holes just through the inside plastic where the top of the thermostat was going to go so that I could slip the two tabs into it. Then I used the same screw to secure the bottom of the thermostat to the side. Adding a thick line with a magic marker helps me see what the temperature setting is (approximately). Reinstall the light cover.